So, you’re thinking about hitting the open road on two wheels? That’s awesome. But before you feel the wind in your hair (through a DOT-approved helmet), there’s a little hurdle called the motorcycle driving test. You might be wondering, how does a motorcycle driving test work, and what can you do to pass it? Feeling a bit nervous or unsure about the process is normal. This guide will walk you through everything, so you’ll know exactly what to expect and understand how a motorcycle driving test works.
Before You Even Think About the Test: Getting Prepared
Jumping straight into the test without any prep isn’t the best idea. Like anything important, a little groundwork goes a long way. You want to show up feeling confident and ready.
Eligibility: Are You Ready to Ride?
First, you must see if you’re eligible to take the test. Age requirements can differ from state to state. For instance, many states allow you to start the process around 15 or 16, often with a motorcycle learner permit phase.
It’s a good idea to check your local Department of Motor Vehicles (DMV) or equivalent licensing agency for the specific rules where you live. Often, you’ll need to hold a motorcycle learner permit for a particular period before you can take the full driving test. This learner permit phase is crucial for gaining practical motorcycle skills before attempting the full road skills test.
Beyond age, most states require you to pass a vision screening and a written knowledge exam focusing on traffic laws and motorcycle-specific regulations to obtain your learner permit. Your existing driving record might also be reviewed. This permit lets you practice riding legally, usually with some restrictions, paving the way to your full motorcycle license.
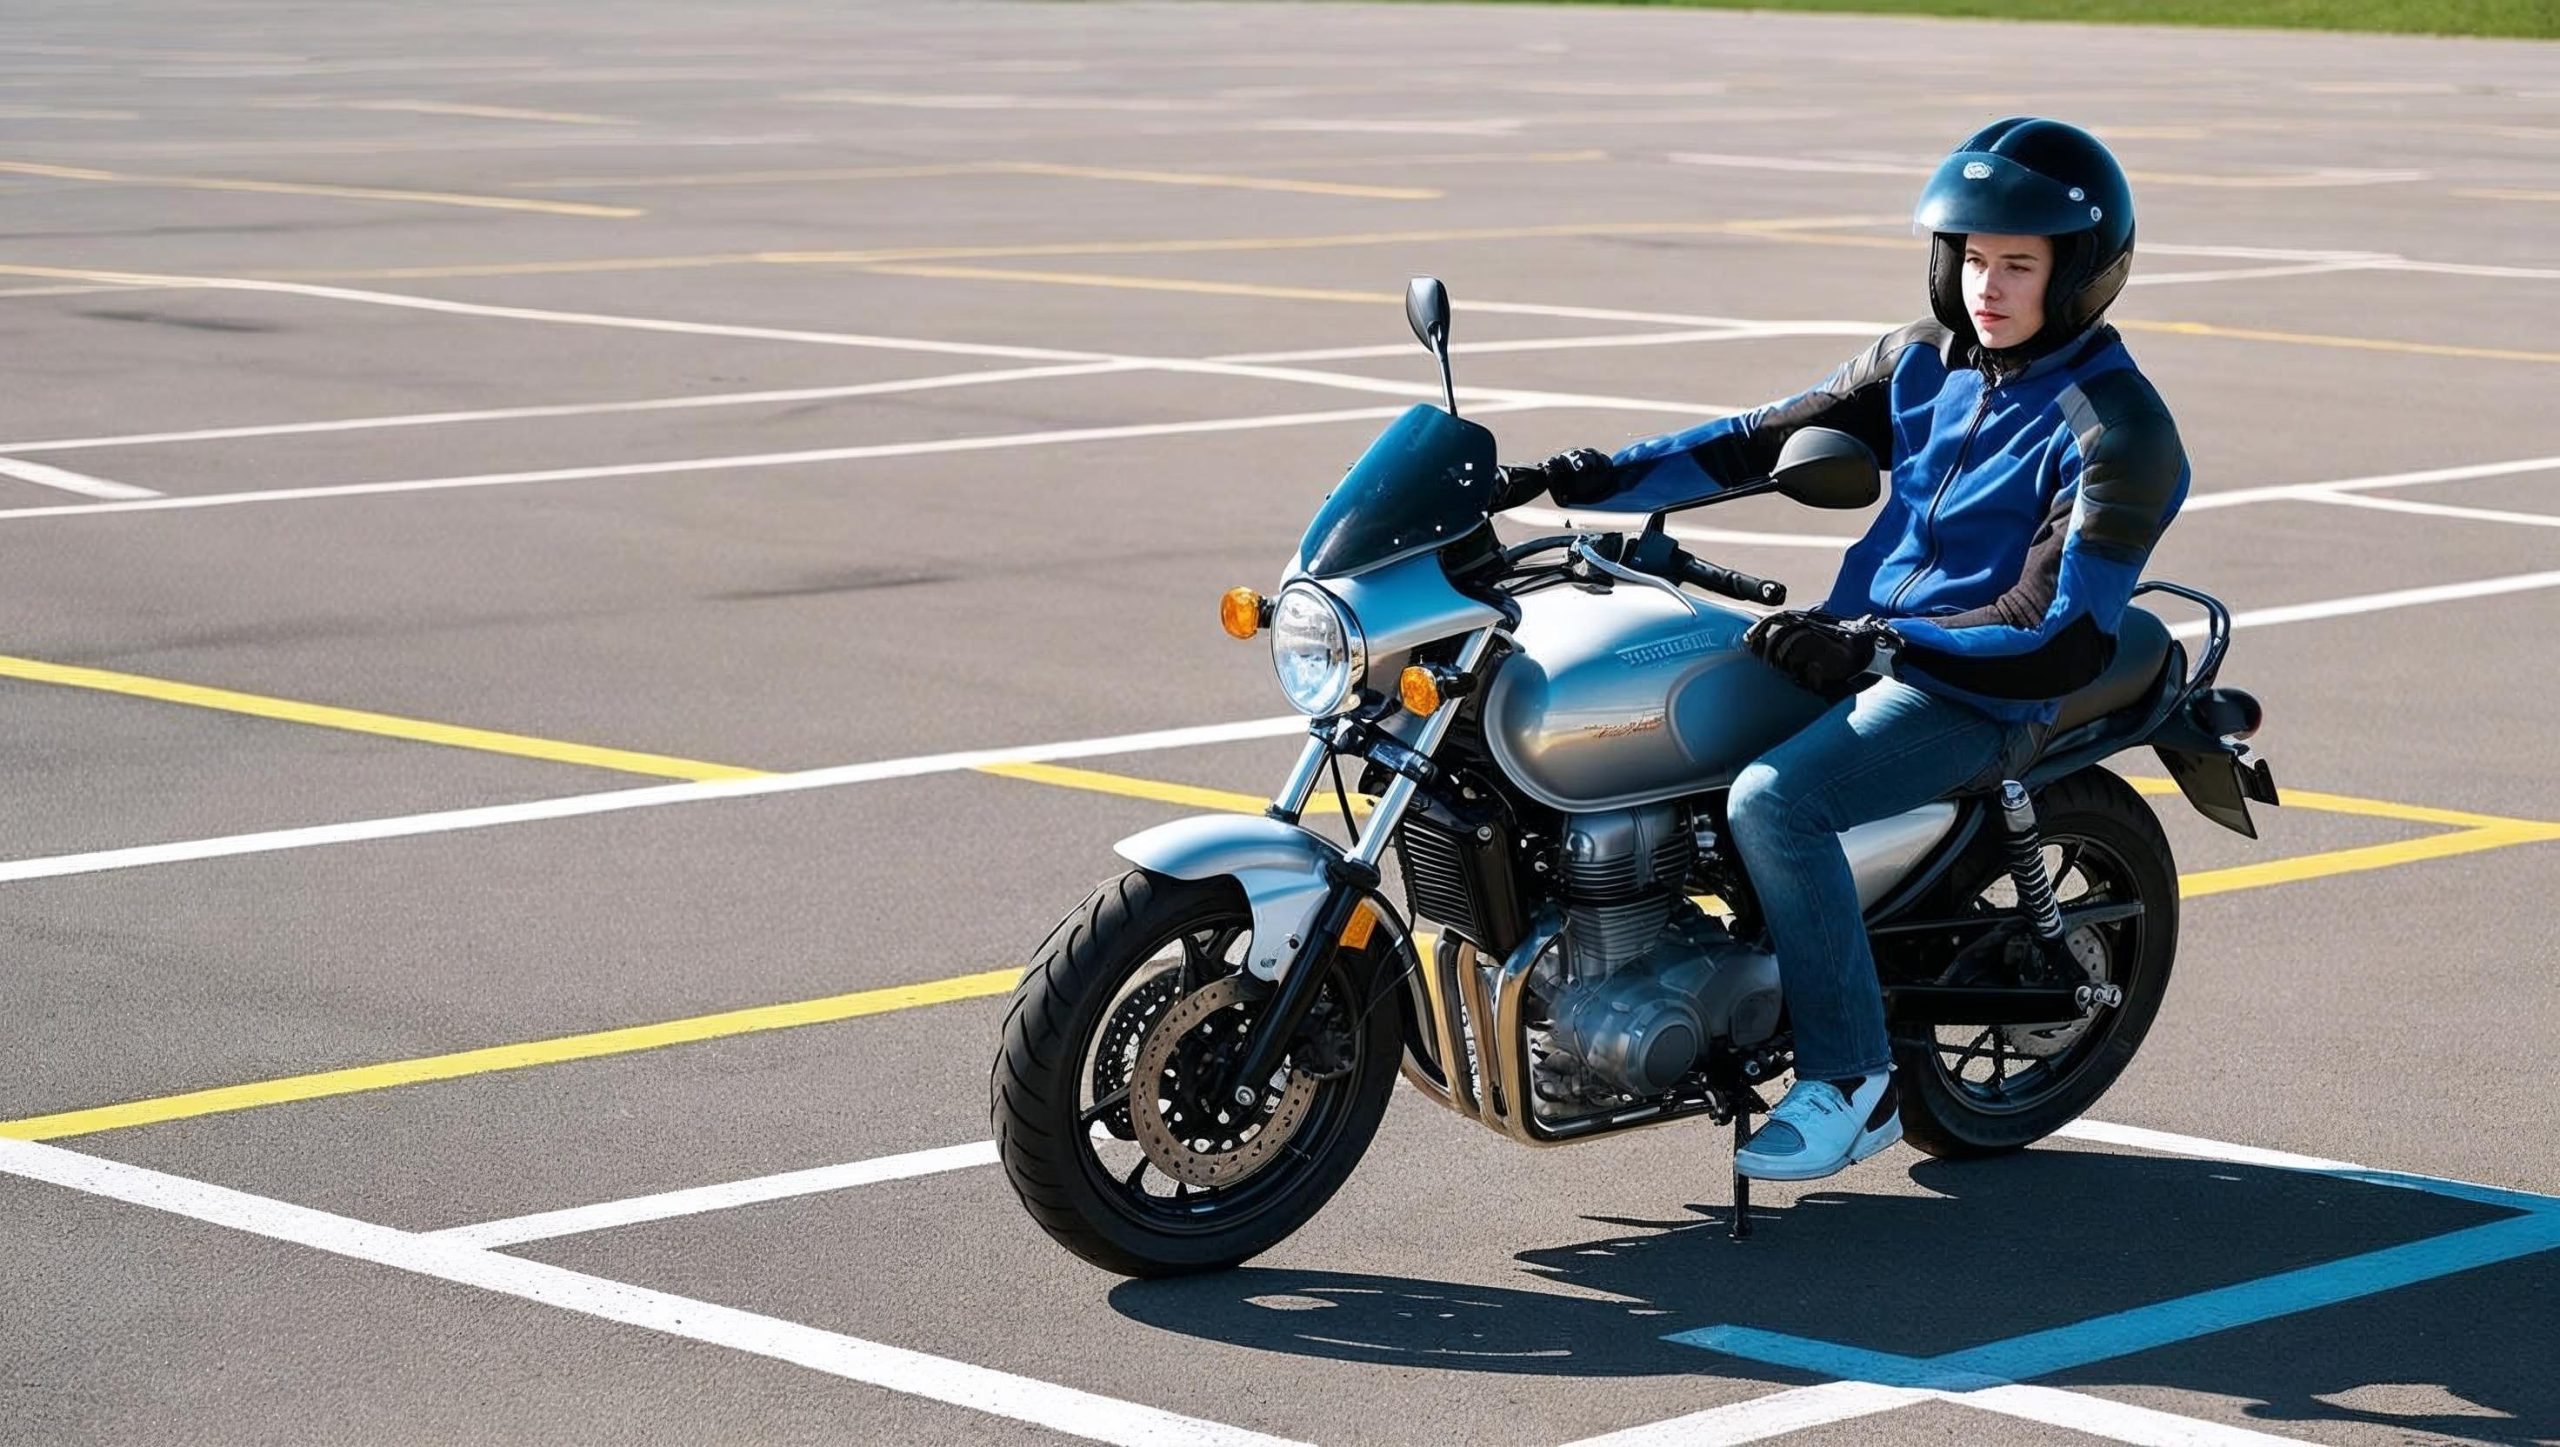
Gear Up: Safety First (and It’s Usually Required)
When you show up for your test—and really, anytime you ride a motorcycle—having the right gear is super important. Examiners will expect you to be appropriately attired. This isn’t just about looking the part; it’s about your motorcycle safety.
At a minimum, you’ll likely need a helmet approved by the Department of Transportation (DOT); look for the DOT sticker on the back. Eye protection is also essential, so have goggles or a face shield if your helmet doesn’t have one built in. A DOT-approved helmet is non-negotiable, built to protect your head in an impact.
Eye protection shields you from wind, debris, and insects, which can be serious hazards at speed. Many test centers also want to see you in long sleeves, long pants, and sturdy, over-the-ankle footwear – no flip-flops or sneakers. Gloves are also an excellent way to protect your hands and give them a better grip; the Motorcycle Safety Foundation (MSF) always stresses the importance of proper gear. Long sleeves and pants help prevent abrasions in a slide, while sturdy footwear protects ankles and provides sound footing, and gloves enhance your grip and protect your hands.
Practice, Practice, Practice: Mastering the Basics
You really can’t practice too much. The motorcycle test isn’t just about knowing the rules of the road; it’s about showing you can control the bike safely. Many riders find taking an MSF Basic RiderCourse or a similar state-approved training program helpful.
These courses often cover the very motorcycle skills you’ll be tested on, and in some states, passing an MSF course can even grant a skills test waiver, meaning you might not need to take the DMV’s motorcycle skills test. An MSF Basic RiderCourse, or similar rider education program, teaches you essential motorcycle handling techniques and instills good safety habits from the start. Instructors provide real-time feedback in a controlled environment, helping you correct mistakes before they become ingrained; the potential for a skills test waiver by presenting a completion card is a significant benefit.
Focus your practice on low-speed maneuvers. It’s crucial to make smooth turns, stop precisely, and look where you want to go. Practice tight turns, like figure eights or U-turns, in a safe, open space like an empty parking lot.
Use the clutch and throttle together for smooth starts and stops. The more you practice these fundamental driving skills, the more natural they’ll feel on test day.
Understanding the Big Day: How Does a Motorcycle Driving Test Work?
You’ve got your learner’s permit and gear and logged plenty of practice hours. What happens during the test? While the specifics can vary slightly depending on your location, most motorcycle tests have a couple of main parts.
The Pre-Ride Inspection: Your Bike and You
Before you even start the riding part, the examiner will likely quickly check your motorcycle. They want to make sure your motor vehicle is safe and street-legal. This isn’t meant to trick you; it’s a basic safety check.
They’ll probably ask you to point out or demonstrate things like your headlights (high and low beam), taillight, brake light (activated by both front and rear brakes), turn signals, horn, and tires (checking for proper inflation and wear). Ensure your mirrors are adjusted correctly, your brakes feel responsive, and your license plate is securely attached and visible. Performing this pre-ride check demonstrates responsibility and awareness of your motor vehicle’s condition.
It’s also a good time to ensure your vehicle registration is current and you have proof of insurance requirements being met. If you recently moved, confirm that the motor vehicle department has updated your address change. You should know your bike well enough to find and operate all these controls without fumbling; sometimes, they might even ask you to show hand signals, even if your bike has electric turn signals.
Familiarize yourself with a T-CLOCS inspection checklist (Tires, Controls, Lights, Oil, Chassis, Stands) – it’s a good habit for every ride, not just the test. Below is a general overview of what T-CLOCS covers:
| Letter | Stands For | Key Items to Check |
|---|---|---|
| T | Tires & Wheels | Air pressure, tread depth, wear, and damage to rims. |
| C | Controls | The levers (clutch, brake) operate smoothly, the cables are not frayed, the throttle snaps back, and the hoses are not leaking. |
| L | Lights & Electrics | Headlight (high/low beam), taillight, brake lights (front/rear activation), turn signals, horn, battery condition. |
| O | Oil & Other Fluids | Check the engine oil level, brake fluid levels (front/rear), and coolant level (if liquid-cooled), and look for leaks. |
| C | Chassis | Frame condition, suspension (front/rear) for smooth travel, chain/belt tension and lubrication, and loose fasteners. |
| S | Stands | Sidestand and centerstand (if equipped) operate correctly, and the spring holds them in place. |
The Skills Test: Showing What You Can Do (On-Cycle Portion)
This is the part most people think about when they hear motorcycle test. It usually happens in a closed course, often a painted layout in a parking lot. The goal is to see if you can handle the motorcycle with skill and precision at low to moderate speeds, demonstrating your road skills.
Your understanding of how a motorcycle driving test works gets tested here. This part of the process is sometimes called the road skills test or driving skills test. Typical exercises include a cone weave or serpentine, where you’ll ride in a weaving pattern through a line of cones.
This shows your ability to make smooth, controlled turns and maintain balance. You’ll likely have to perform U-turns or figure eights within a marked box or painted lines, testing your ability to make tight turns without putting your foot down. The cone weave, for example, directly tests your steering input and ability to maintain balance at low speeds, which is crucial for handling tight spaces.
U-turns and figure eights assess your control in confined areas, a vital motorcycle skill for parking or turning around on narrow streets. Another critical skill is the quick stop, where you’ll need to bring the motorcycle to a controlled, sudden halt as if avoiding an unexpected hazard. You might also be tested on an obstacle swerve, demonstrating you can safely maneuver around something in your path; a regular stop, showing smooth deceleration and control, is also standard.
The quick stop is vital, as it simulates an emergency braking situation, checking your ability to use both brakes effectively without losing control. The obstacle swerve tests your capability to make a sudden steering input to avoid a hazard on the motorcycle road, then regain stability. Throughout these maneuvers, examiners are watching your clutch control, your throttle work, your ability to shift gears smoothly (if applicable), and very importantly, where you’re looking. Always look where you want to go, primarily through turns – this is a fundamental motorcycle riding skill.
The Road Test (If Applicable in Your State)
Some states include an on-road portion in their motorcycle driving test, while others rely solely on the closed-course skills assessment. If your state does have a road test, you’ll ride on public streets with an examiner following you, usually in a car or on another motorcycle. They will often give you directions for this motorcycle road test through a one-way radio earpiece.
During the road test, they want to see how you interact with real traffic. This includes obeying all traffic laws (speed limits, stop signs, traffic lights), proper lane positioning, and making safe lane changes and turns. Remember that other motor vehicles share the road; your awareness is critical.
On the motorcycle road, examiners will assess your judgment in real-world scenarios. This includes selecting appropriate gaps in traffic for turns and lane changes, maintaining a safe following distance, and correctly interacting with pedestrians and other motor vehicles. They will also note how you handle varied road conditions and potential hazards, such as commercial motor carriers or buses, ensuring you position yourself for maximum visibility and safety. They’ll watch if you check your mirrors and perform head checks (looking over your shoulder) before turning or changing lanes. Maintaining appropriate speed for conditions and showing general awareness of your surroundings are vital for every motorcycle rider.
What Are They Looking For? Common Reasons for Failing
Knowing what leads to a failing grade can help you avoid those mistakes. Examiners aren’t trying to fail you; they want to ensure you’re safe on the road. Nobody wants a new motorcycle learner to get hurt because they weren’t ready.
One of the most common ways to fail the skills portion is to put your foot down during a maneuver that is not allowed, like a U-turn or cone weave. Stalling the motorcycle repeatedly can also cause issues. Dropping the bike is usually an automatic fail.
Hitting cones or going outside the painted lines for exercises will also cost you points, potentially enough to fail. Not looking where you are going, especially in turns (fixating on the ground or a cone), is a big red flag for examiners. It shows a lack of control and proper technique for any motor-driven cycle, including a motor scooter.
Putting a foot down might seem minor, but it indicates a loss of balance or improper technique, which can be dangerous at higher speeds or in traffic. Stalling repeatedly suggests poor clutch and throttle control, potentially leaving you vulnerable in intersections. If there’s an on-road portion, failing to observe properly by not doing head checks before turns or lane changes is a significant mistake. Disobeying any traffic laws, like speeding or running a stop sign, will almost certainly result in a fail and can negatively impact your driving record.
Failing to perform head checks means you might miss a vehicle in your blind spot, a leading cause of collisions. Disobeying traffic laws during the test demonstrates a lack of respect for road rules and a potential danger to yourself and others. Poor speed control (going too fast or slow for conditions) and not following the examiner’s instructions are other reasons people don’t pass. Sometimes, even showing up with a motorcycle with mechanical issues (like a broken taillight or expired license plates) can prevent you from starting the test.
Tips for Acing Your Motorcycle Test
Passing your motorcycle test is achievable with the right approach. You’ve got this. Here are some tips to help you get that motorcycle endorsement.
First, understand your state’s specific test requirements. Your local DMV or licensing agency’s official website is the best place to start; they usually have a motorcycle operator manual you can download that outlines the test procedures. This manual might also cover topics like how to renew registration, details about vehicle registration, or how to complete an address change for your driver’s license.
When visiting your DMV’s official website, look for a main menu or straightforward navigation to find motorcycle licensing information, online services for scheduling, or details on handling an address change. Some resources, like the National Highway Traffic Safety Administration (NHTSA), also provide general information about rider safety and driver training, which often aligns with test expectations. This knowledge, including motorcycle knowledge and written knowledge, is foundational.
As mentioned, consider taking a recognized training course like an MSF program, which provides excellent rider education. Instructors are experts at teaching the skills needed to pass, and often, the test is part of the course itself, leading to a completion card. Practice the exact maneuvers that will be on your skills test.
If your DMV has diagrams of the test layout, try to replicate it in a safe practice area; some states even offer a practice test online or in their manuals. Use the motorcycle you’re most comfortable with, preferably the one you’ve been practicing on. Showing up on an unfamiliar bike adds extra stress you don’t need; this applies whether it’s your bike or a rental from a driving school.
On test day, try to arrive a little early. This gives you time to settle in, check your bike, and calm your nerves. Listen very carefully to all instructions the examiner gives you.
If you’re unsure about something, politely asking for clarification before you start a maneuver is okay. When performing observation checks (like looking over your shoulder), make them obvious. Slightly exaggerate your head movements so the examiner sees you doing them.
Of course, get a good night’s sleep and have something to eat before you go; being tired or hungry won’t help your concentration when trying to obtain your driving privilege. Also, ensure you meet all insurance requirements for operating a motorcycle in your state, as this can be checked. Verify the transfer and testing requirements for individuals with an out-of-state motorcycle license.
Remember that your driver’s license reflects your driving privilege, so approach the test seriously. Check if the DMV offers payment plan options for fees, though this is less common for testing fees and more for registration renewal. It’s also good practice to be aware of the site’s privacy policy if you are using online services. If you need to update your vehicle registration due to an electronic lien release, do this before avoiding any complications on test day.
What Happens After? Next Steps
So, you’ve taken the test. What comes next depends on the outcome.
If You Pass: Congratulations.
Passing your motorcycle test is a fantastic achievement. You’ll usually get some paperwork that day, and then you’ll be able to get your full motorcycle endorsement or driver’s license from the DMV. Be sure to update your emergency contact information when you get your new license.
Be aware that some states have provisional licenses or restrictions for new riders, like curfews or passenger limitations, so make sure you understand those. Some may also require you to pass a separate knowledge exam or knowledge test if you haven’t already. Remember to keep your motorcycle license current, including any future registration renewals for your bike.
Getting your license isn’t the end of your learning journey, though. Keep practicing, consider advanced riding courses, and always strive to be a better, safer motorcycle rider. The freedom of the open road awaits, whether you ride a motorcycle type beyond just a basic motorized bicycle for local trips. If you are a commercial driver, this endorsement is separate from your commercial driver’s license (CDL) but equally crucial for legal motorcycle operation.
If You Don’t Pass: Don’t Get Discouraged
If things don’t go your way on the first try, it’s not the end of the world. Many skilled riders didn’t pass on their first attempt. The most important thing is not to get discouraged.
Ask the examiner for specific feedback on what you need to work on. They can usually tell you exactly which parts of the test gave you trouble. This might involve aspects of basic rider skills or understanding specific road skills.
There’s typically a waiting period before you can retest, so find out what that is for your state. Use that time to practice the specific areas where you struggled. Perhaps it was the U-turn, or maybe quick stops.
Whatever it was, focus your efforts there. You might even consider getting more formal driver education or one-on-one coaching before your next permit or skills test. You’ll get it next time. Remember that even some commercial driver license applicants face retests, so perseverance is valuable.
Permit.Bike is singularly devoted to the purpose of providing an easy-to-learn and simple approach to the act of riding.